photo Home-01_zps4183128e.jpg              photo AboutJess-02_zps9efae9a4.jpg              photo Email-03_zpsfe60254d.jpg              photo Sponsor-04_zpsad5f9cd7.jpg

Thursday, September 12, 2013

Printables on Etsy

Hey ya'll! Today I'm super excited to announce that I officially opened my own Etsy shop! If you don't know what Etsy is check it out here. You will love all of the handmade and vintage things people sell.

I am constantly making things for myself, so I thought why not share the love to the public. I only have printables up for sale right now. I'm not really sure how to market this so I thought I would share it with my followers!

Check out my shop Love Your Pretty Prints and make sure to favorite it and everything you see! I would love the support!

Here are the two printables I have available for sale! The first a fall themed one for my favorite time of the year.


The second this darling saying I LOVE that inspires me!


Thanks for all your support!

-Jess

Wednesday, September 11, 2013

DIY Topiary Crafternoon Project


My apartment seemed lacking some life. Since we can't have pets and I can't keep a plant alive, I turned to the next best thing... a Topiary!

This project was EASY! Anyone could make this super cute craft and it was very cheap.

The supplies you will need are:
  • 2 different size moss balls (I bought mine at Hobby Lobby)
  • 1 Dowel (You choose what size fits best with your moss balls)
  • Jute String
  • Container to hold topiary
  • Extra moss for the container
  • Foam
  • Hot Glue Gun
I started by putting the dowel through the center of the two topiary balls. I eyeballed what looked good for the spacing. I then glued and wrapped the jute around the dowel to give it a more natural look. 


I just bought a cheap flower pot and painted it the color I wanted to coordinate with the room. I already had the mustard yellow (or Mac and Cheese yellow) craft paint and used a foam brush to apply.


I bought the foam at the same time as the pot and found the same circumference to fit perfectly into the pot to hold the dowel up. I measured to find the middle and made a hole. 


I then hot glued the extra moss I bought to the foam. This is super fun but soo messy!


I then placed it in the pot and touched up the edges where the foam was still showing. 


 All you need to do now is put the dowel in the pot! Easy project! 


My husband even loves the color and life it brings to our apartment! Let me know what you think! If you like this project you may want to check out our dresser revamped into an entertainment center here.

-Jess

Oh and one more thing. I've been contemplating a give away... How would you like to win cute items for your home?? 

Monday, September 9, 2013

Where to Buy Statement Necklaces for Cheap


Statement necklaces are a trendy and fun item that can make an outfit complete, but can also break the bank. JCrew and Anthropologie are two stores that have some necklaces I lust over, but definitely cannot afford.

One of my favorite sites to buy clothes and jewelry is andRuby. They always keep up on the trends and sell their items for low prices.

Here are a few of my favorite necklaces I have found.


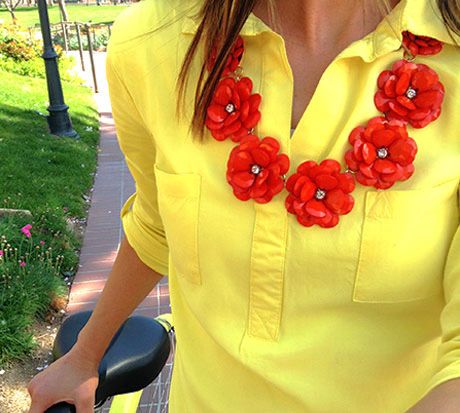
Rose J.Crew inspired necklace. $15. Buy it here.
I own the red flower one and I absolutely love it. 
Fancy Fringe Necklace. $11.99. Buy it here.

Also have you ever checked out GroopDealz?? It's an addicting website. They have deals on some of the cutest items that are popular, but they are only available for a short time (usually about 24-48 hours). If you like something, you just have to buy it since it might not be there tomorrow.

Some of my favorites I am tempted to buy are these beauties:


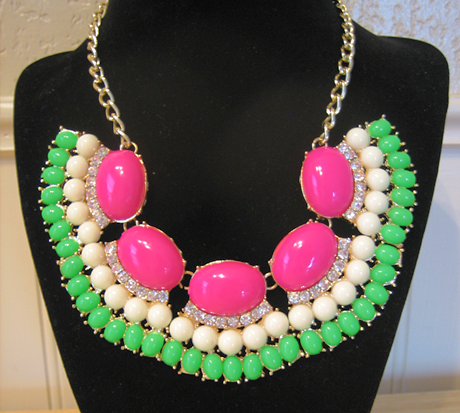
 Isn't this gorgeous?? Buy it here. Only $10.


Okay this one is a no brainer. Buy it now. Here. Only $12.99. 

Let me know what your favorite places to buy trendy jewelry are!

If you like this post, you may want to check out my summer fashion list under $15 here.

-Jess


Friday, September 6, 2013

DIY Wedding Backdrop


Oh hey, I'm alive. I just took a little break from blogging since life is hectic. I have been sick, grad school just began, and Cliff just had surgery (you can read about it on my other blog). I haven't had time to be super crafty woman and thrifter of the week, but I have a ton of fun wedding projects I haven't shared yet. I am so excited to talk about this super easy wedding backdrop. The truth is I wasn't the person who made this. I helped a little, but I owe this project to my lovely mom and friend Jen. They helped make tons of my wedding decorations while I was still in grad school.


So as you can see this backdrop is shabby chic and perfect to create with your own styles and colors. I used a few different types of lace I found on clearance at a local fabric store, burlap, and a mint green fabric. And when I say I, I mean my mom and Jen haha. It was simply the task of cutting the strips to the desired length and tying them to some rope (keeping with the rustic shabby chic look). I actually named the style/theme of my wedding as "country vintage shabby chic" and yes my husband memorized it. He was such a trooper. 
Just my mini session with Harmony before the reception.

I borrowed old doors from my parents in law and boom we had the perfect backdrop to stand in front of during the line. It also held the perfect place to do the cake cutting at our outdoor reception.


Overall it wasn't too expensive to make, and it turned out perfect for my wedding theme! Thanks Mommy and Jen for the perfect DIY!

Wednesday, August 28, 2013

How to Cut Down Textbook Costs


Alright you budget conscious college students. Here is the scoop on buying books. If you want to cut the cost of your books in half, listen to me. I've been there done that, trying various ways to save money.

Here is what I spent this semester on books:

My Price = $66.95
Bookstore Price = $256

Here I am so happy because I saved money on my textbooks. Or because I was graduating. Class of 2012 baby.

1. DO NOT BUY BOOKS AT THE BOOKSTORE. University bookstores are really good at keeping prices high, even if they are used. Although the money is sometimes used for scholarships, sometimes donating your pocketbook for these funds isn't worth it.

2. Rent books if you don't plan on keeping them long term. If you are taking a botany class and your degree is in math, you might not need to keep this textbook for future reference. There are many websites you can rent from. I just rented a textbook from bookrenter.com which saved me over $100.

3. Used books aren't bad. Used books are usually classified this way if they have been bought and sold. Many students keep their books in great condition or highlight the important stuff. Who wouldn't want highlighted pages?? Bright pink and yellow pages are much more exciting to read.

4. Download eBooks. Not all textbooks come this way, but some do, and since they skip printing costs, can sell them for cheaper.

5. Shop around. It's okay to shop in more than once place for your books. I cut costs by buying all of my books from different websites. There are even websites that compare prices from the web for you. How great is that?? Try http://www.booksprice.com/.

Graduate school is a pain in the butt, but buying your books doesn't have to be. Now I have the money I saved to buy a new pair of shoes. :)

Let me know how you save money in college! I would love to hear.

-Jess


Thursday, August 22, 2013

DIY Monogram Window


Today's project was super easy, fun, and it turned out to look a lot more expensive that it actually cost. 

I already bought this window frame earlier at DI for $5. It had some beadboard and dried out flowers in it, but it was easy to remove. Old window frames are sometimes harder to find good deals on. My suggestion is to always keep your eye open for one. Some garage sales will have them and sometimes craigslist. The one place that always has them are antique stores, but you have to be willing to pay (usually $50 for old windows). I have even seen people ripping down old homes and putting them on the street for the trash pickup. 

The only other expense was some black craft paint and some brushes. I just used regular thin paint brushes. This was less than $5, so overall it was a $10 project. 

First I cleaned the glass really well with windex. I then took the letter "P" for "Peterson" I already had as home decor and traced it on the front of the glass with a chalkboard paint pen I used in a previous project (check it out: DIY Chalkboard Labels). If you don't have something to trace, you could blow up a print for cheap at Staples (usually under .50 cents). 


I bought these pens at Michael's (they have definitely paid off). I used them since it would be easy to wipe the outline off after painting. 


I then painted the back of the window with a few coats of black paint until the letter was completely covered. 


And now I have a unique piece of artwork perfect for our apartment!


PS Here are two more of the pillows I finished in our bedroom from the pillow making tutorial I posted earlier this week. You can check it out here.


Let me know what ya think!

-Jess


Wednesday, August 21, 2013

DIY Clothespin Magnets


Here's an easy and quick project you can do to spruce up your fridge to match your personality. I lucked out and snagged these cute clothespins in the Target dollar bins (my other true love). I just used my hot glue gun and some strong magnets to complete this project. 


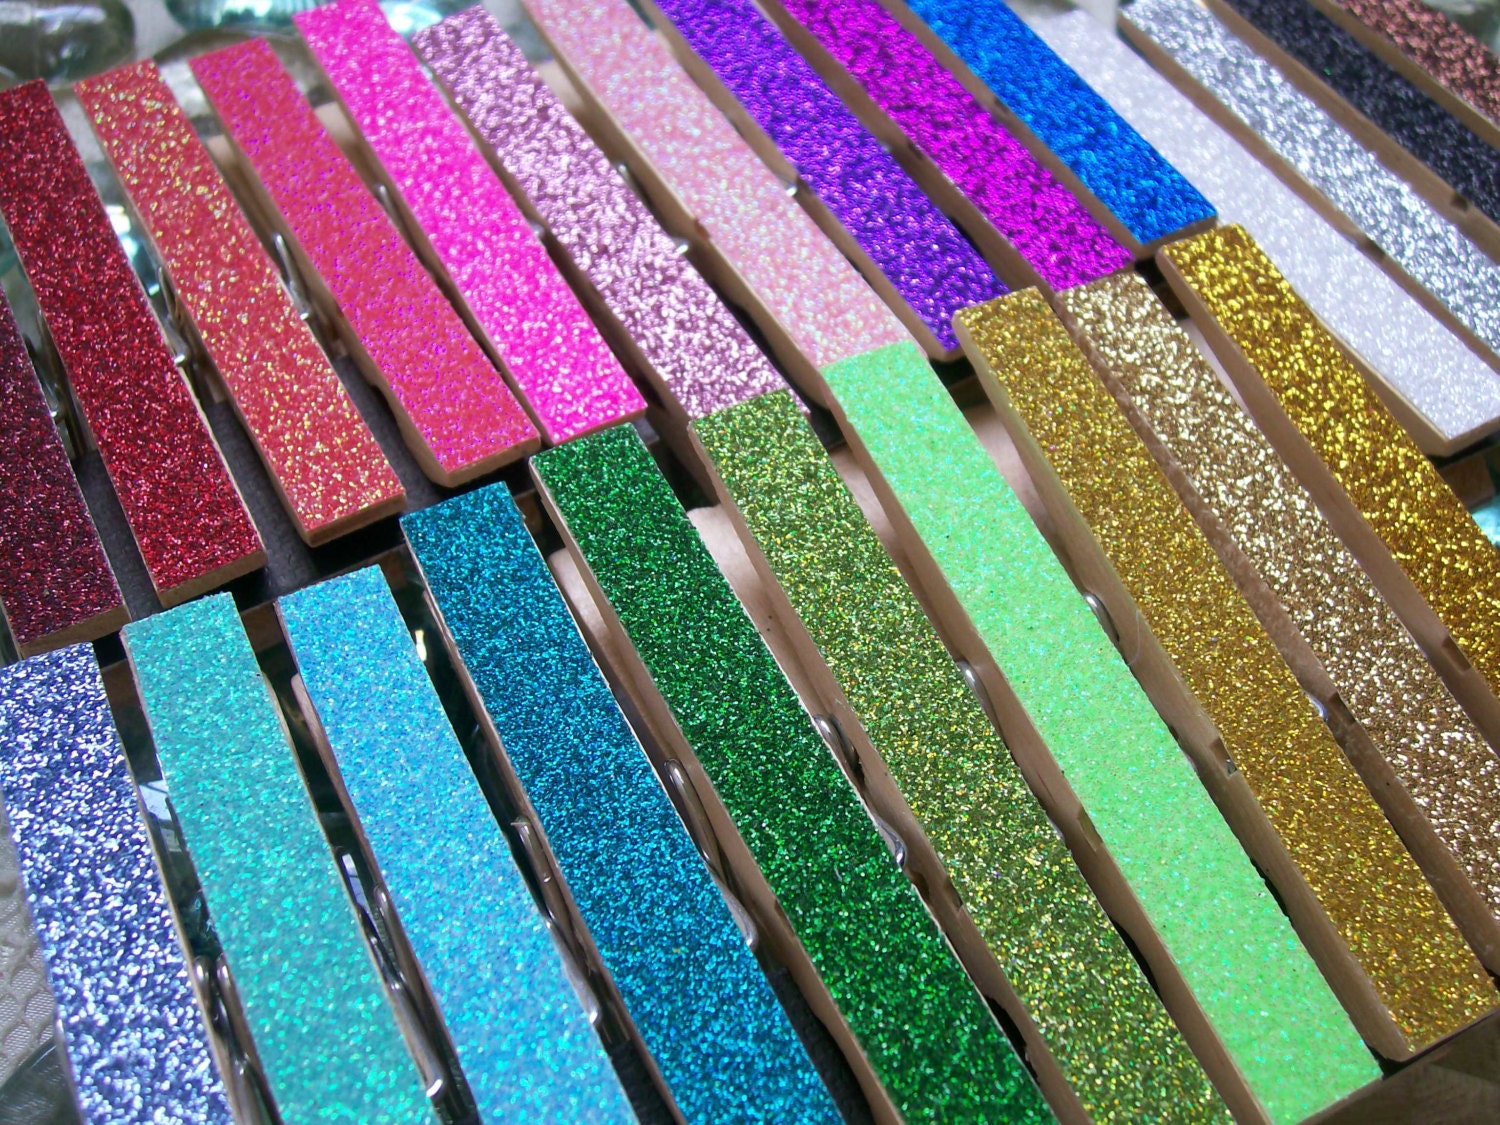
If you can't find decorated clothespins, there are a ton of tutorials online on how to spruce them up. Here are a few:
Click Here for the full Tutorial

Buy on Etsy, or be inspired to make your own
The options are endless. You could do any color, pattern, or style you wanted to fit your life and style! 

-Jess
Related Posts Plugin for WordPress, Blogger...